Fridge Organization Aesthetic: Step-by-Step Guide
There’s something deeply satisfying about opening a fridge that’s organized and beautiful. The “fridge organization aesthetic” isn’t just for social media — an organized fridge wastes less food, saves money, and makes cooking genuinely more enjoyable.
Here’s exactly how to get there, step by step.
Step 1: Empty Everything Out
Yes, everything. Take every single item out of your fridge and place it on the counter.
- Toss anything expired, moldy, or mystery-aged
- Check condiment dates (ketchup lasts ~6 months opened, mayo ~2 months)
- Wipe down every shelf and drawer while it’s empty — warm soapy water works perfectly
Time: 20 minutes. Put on a podcast, it flies by.
Step 2: Create Zones
The secret to a fridge that stays organized is zones. Assign every shelf a job:
- Top shelf: Ready-to-eat foods — leftovers, yogurt, snacks, drinks
- Middle shelf: Dairy — milk, cheese, eggs (despite the door having an egg holder, eggs last longer on a shelf)
- Bottom shelf: Raw meat and fish (coldest spot, and if it leaks, it won’t contaminate everything below)
- Drawers: Fruits in one (low humidity), vegetables in the other (high humidity)
- Door: Condiments only — it’s the warmest zone, so no milk or eggs here
Step 3: Invest in Clear Bins
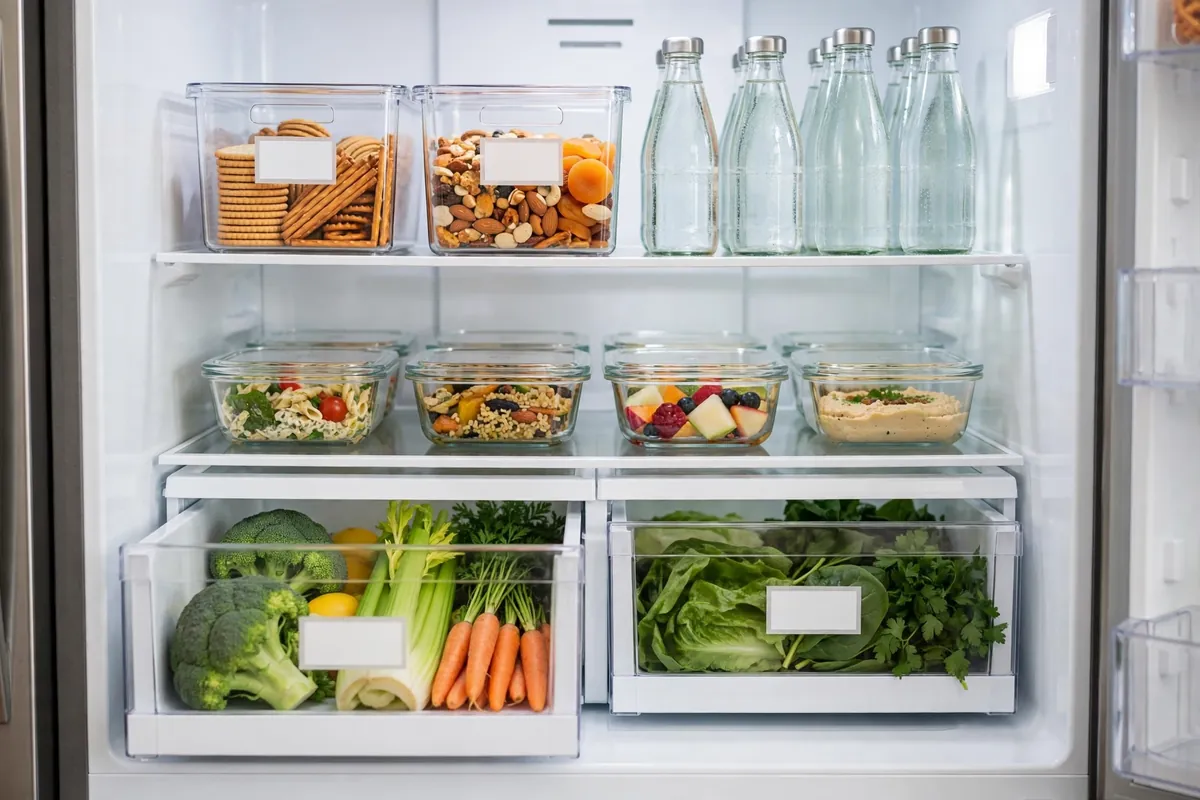
Clear bins are the backbone of the fridge aesthetic. They group like items, prevent things from getting lost in the back, and look effortlessly beautiful.
What to get:
- 2-3 medium clear bins for the shelves (snacks, leftovers, drinks)
- 1 narrow bin for condiment packets and small jars
- 1 egg holder (flat, stackable)
- Small turntable (“lazy Susan”) for sauces and dressings
Budget tip: Dollar store bins work just as well as the expensive ones. Clear is clear.
Step 4: Decant and Standardize
Transfer items into matching containers where it makes sense:
- Snacks into clear jars
- Leftovers into matching glass containers (not a chaos of mismatched plastic)
- Drinks lined up by type
You don’t need to decant everything — just the things you see daily. Visual consistency is what creates the aesthetic.
Step 5: Label the Zones
A label maker is the finishing touch that makes it look professional and keeps the whole household maintaining the system.
Label bins (“Snacks,” “Leftovers,” “Drinks”), shelves, and drawers. When everything has a labeled home, everyone puts things back correctly.
Step 6: The Weekly 5-Minute Reset
An aesthetic fridge isn’t a one-time project — it’s a tiny habit:
1. Toss expired items (2 min)
2. Wipe any spills (1 min)
3. Pull everything forward — push older items to the front (2 min)
Do this on grocery day, before you unload new food. Your fridge will never go back to chaos.
Fridge Organization Shopping List
- ☐ Clear bins (medium × 3)
- ☐ Narrow bin for packets
- ☐ Turntable for condiments
- ☐ Matching glass food containers (set of 6-10)
- ☐ Label maker or chalk labels
- ☐ Shelf liners (optional, makes cleanup easier)
Estimated total: $25-40
Frequently Asked Questions
How do I make my fridge look aesthetic on a budget?
Clear dollar-store bins + a $15 label maker = 90% of the aesthetic. Decanting snacks into jars you already own covers the rest. You don’t need expensive organizers.
Where should milk go in the fridge?
On a middle shelf, not the door. The door is the warmest zone and temperature fluctuates every time it opens. Milk lasts significantly longer on a shelf.
How often should I clean out my fridge?
A quick 5-minute reset weekly (toss expired, wipe spills) plus a deep clean (empty everything, wash shelves) every 2-3 months.
Your fridge is the most-opened appliance in your home. Make it beautiful — you’ll smile every time you open the door.